
Introduction
Today, in just 3 quick and easy steps we will build a Razorpay PHP payment gateway.
But why?
Pretty simple: E-commerce is the new way people shop in our world. And being able to pay online is an essential part of the modern business strategy.
Online payment methods are booming, you can see this proof in the success of Amazon-like websites. These online payments get directly routed to your bank account by payment providers. So the problem of handling cash is reduced as well.
But making sure that they are done securely is vital. And the best and easiest way to do this is with a payment gateway. What are they? Don’t worry we will explain in detail.
This blog will guide you through all the steps of Razorpay PHP payment gateway integration in PHP.
What is Payment Gateway in PHP?
A payment gateway is a service that enables merchants to accept online payments from customers via credit cards or other means. The gateway provides the seller with an interface to communicate with the buyer’s bank or chosen payment method.
Seems complicated? Let me simplify:
Payment Gateway is usually a third-party service like RazorPay which collect payment on your behalf from your clients. And then passes that to your bank securely.
Just any other service, we use Payment Gateways usually charges a small fee. For example, Razorpay charges 2% per transaction. But Payment Gateway provides a lot of features and advantages for you:
- Trust: In today’s digital world frauds and their methods are increasingly sophisticated, which can make a startup to have problems receiving payments. After all, none want to click an unknown link and pay money. That’s why payment gateways like Razorpay offer trust value. When clients see that they are paying with a payment gateway in PHP, they know you are a trusted business.
- Easy Install: Even if you have never coded in your life and wish for accepting payment online, then Payment Gateway will be the correct path. They are super easy and require very minimum coding. And if you are a coder like me, then Payment Gateway offers you super-simple customization just built for customer needs. Which ultimately saves a lot of development time and headaches.
- Easy to Use for Customers: One of the primary selling points of services like Razorpay is, how easy it is to use for anyone. The payment process is simplified at such a level that anyone who uses the internet can use them. And customers love this simplicity.
- Security: All payments done through the payment gateway are secured. They implement a lot of safety layers to ensure security. Ensuring such a level of safety on your end will require too much work and time.
So now we know why we are using a service like Razorpay. Let’s jump into the code and start with our Razorpay PHP integration.
Step 1: Get RazorPay API Key
The first step in our Razorpay integration in PHP journey will be:
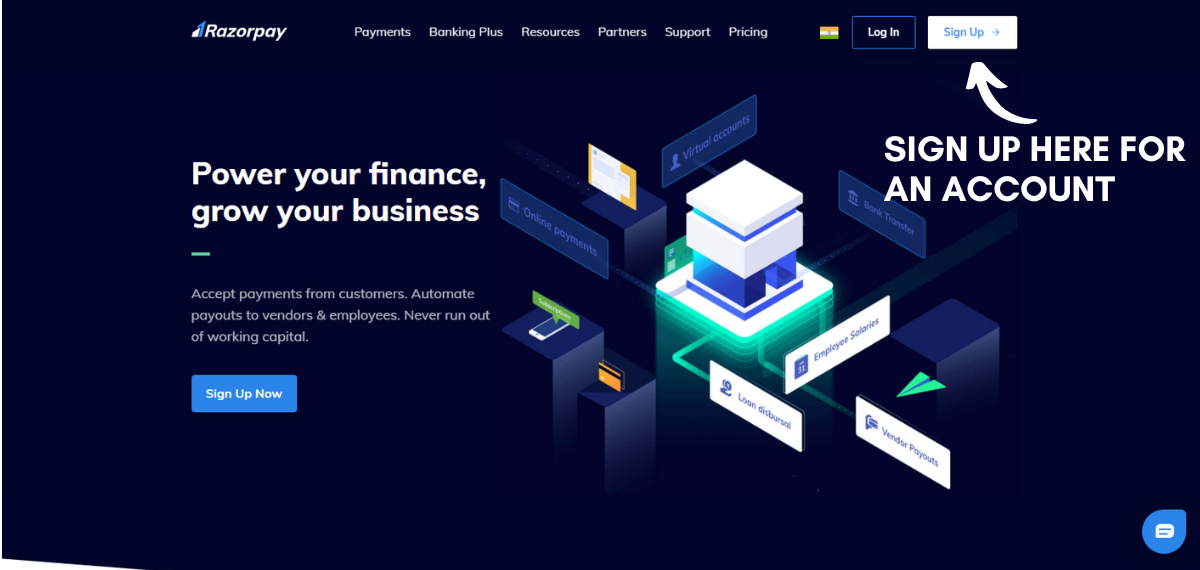
1. Sign up to obtain a test API key. Always try the test one first and resolve any errors. Then implement your production version.
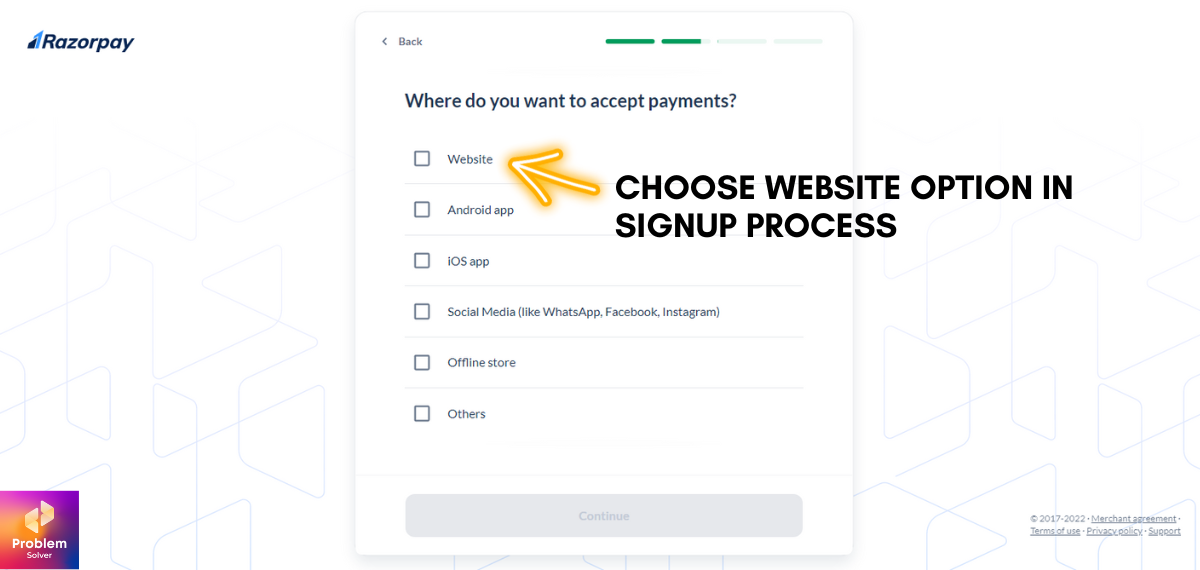
2. Choose Website in this option since we are working with a webpage.
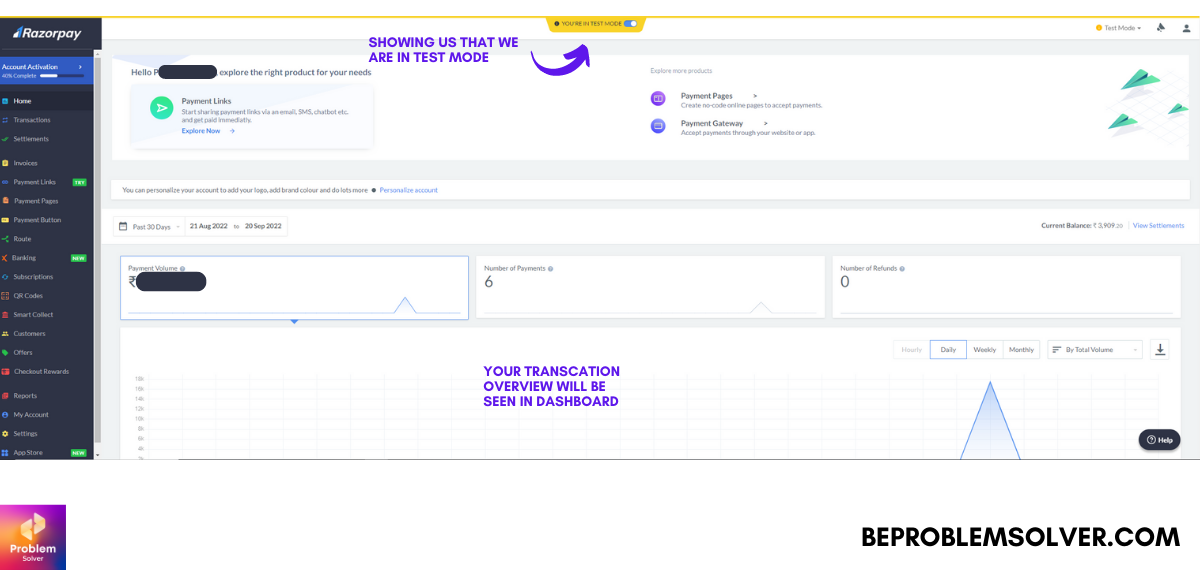
3. Now you will see your dashboard in Razorpay. It might look like this below. Do check if you are in Test mode or not.
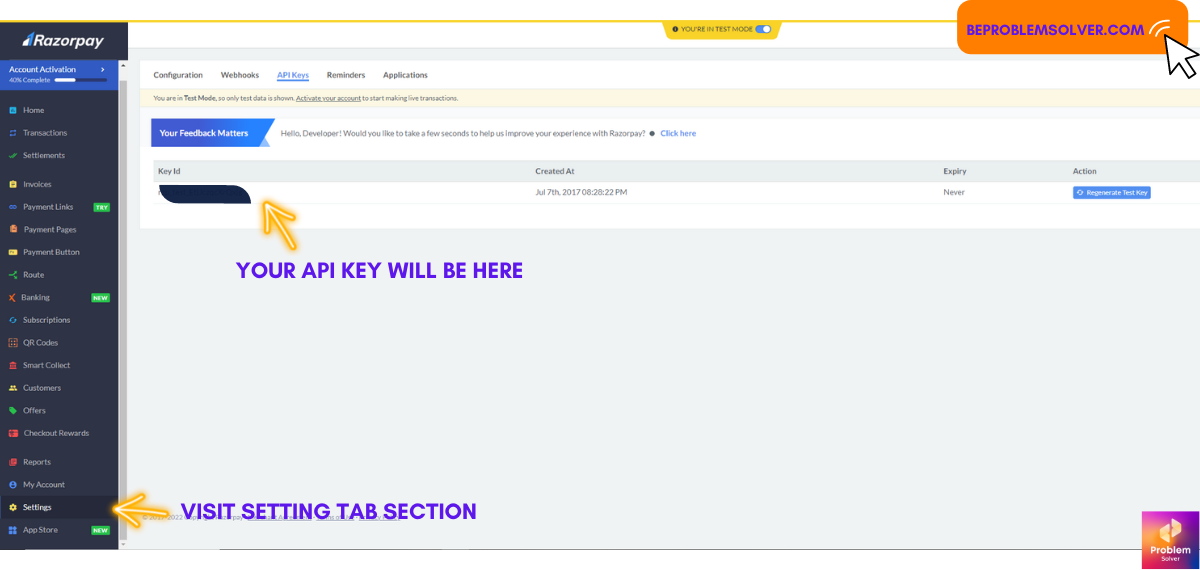
4. Now we go to the setting tab and generate our API Key. Do keep it safe and never share.
Step 2: Jazz up the UI
Time to codify our UI with Bootstrap 5. Like always I’m relying on my trusty VS Code for editing.
<!DOCTYPE html>
<html lang="en">

<head>
  <meta charset="UTF-8">
  <meta http-equiv="X-UA-Compatible" content="IE=edge">
  <meta name="viewport" content="width=device-width, initial-scale=1.0">
  <title>RazorPay</title>
  <link href="https://cdn.jsdelivr.net/npm/[email protected]/dist/css/bootstrap.min.css" rel="stylesheet">
  <link rel="stylesheet" href="pay.css">
</head>

<body>
  <div class="container parent_main">
    <div class="card" style="width: 30rem;">
      <div class="card-body">
        <form action="payscript.php" method="post">

          <div class="mb-3">
            <label class="form-label">Name</label>
            <input type="text" class="form-control" name="name" required>
          </div>

          <div class="mb-3">
            <label class="form-label">Email address</label>
            <input type="email" class="form-control" name="email" required>
          </div>

          <div class="mb-3">
            <label class="form-label">Mobile</label>
            <input type="number" class="form-control" name="mobile" required>
          </div>

          <div class="mb-3">
            <label class="form-label">Billing Address</label>
            <input type="text" class="form-control" name="address" required>
          </div>

          <div class="text-center">
            <button type="submit" class="btn btn-primary">Pay with RazorPay</button>
          </div>
        </form>
      </div>
    </div>
  </div>


  <script src="https://cdn.jsdelivr.net/npm/[email protected]/dist/js/bootstrap.bundle.min.js"></script>
</body>

</html>
Added some basic CSS so we could put our form box in the center. Nothing fancy don’t worry!
body {
  background-color: blueviolet;
}

.parent_main {
  height: 100vh;
  width: 100vw;
  display: flex;
  align-items: center;
  justify-content: center;
}
Step 3: Razorpay PHP Integration
Now the main file that will send our data to Razorpay for the payment process.
We named it “payscript.php“.
<?php
$name = $_POST['name'];
$email = $_POST['email'];
$mobile = $_POST['mobile'];
$address = $_POST['address'];
?>
<!DOCTYPE html>
<html lang="en">

<head>
    <meta charset="UTF-8">
    <meta http-equiv="X-UA-Compatible" content="IE=edge">
    <meta name="viewport" content="width=device-width, initial-scale=1.0">
    <title>Confirm to Pay</title>
    <link href="https://cdn.jsdelivr.net/npm/[email protected]/dist/css/bootstrap.min.css" rel="stylesheet">
    <link rel="stylesheet" href="pay.css">
</head>

<body>
    <div class="container">
        <div class="parent_main">
            <h2 class="h3 text-center">Click the Pay button for payment!</h2>
            <div>
                <button class="btn btn-success" id="rzp-button1">Pay with Razorpay</button>
            </div>
        </div>
    </div>

    <script src="https://checkout.razorpay.com/v1/checkout.js"></script>
    <script>
        var options = {
            "key": "Your API Key Here", // Enter the Key ID generated from the Dashboard
            "amount": "<?php echo $total * 100; ?>", // Amount is in currency subunits. Default currency is INR. Hence, 50000 refers to 50000 paise
            "currency": "INR",
            "name": "Your Company Name",
            "description": "Transaction for <?php echo $plan; ?>",
            "image": "https://example.com/your_logo",
            //"order_id": " //echo(rand(10,100));", //This is a sample Order ID. Pass the `id` obtained in the response of Step 1
            "callback_url": "thankyou.html",
            "prefill": {
                "name": "<?php echo $name; ?>",
                "email": "<?php echo $email; ?>",
                "contact": "<?php echo $mobile; ?>"
            },
            "notes": {
                "address": "<?php echo $address; ?>"
            },
            "theme": {
                "color": "#3399cc"
            }
        };
        var rzp1 = new Razorpay(options);
        document.getElementById('rzp-button1').onclick = function(e) {
            rzp1.open();
            e.preventDefault();
        }
    </script>

    <script>
        window.onload = function() {
            document.getElementById('rzp-button1').click();
        }
    </script>
    <script src="https://cdn.jsdelivr.net/npm/[email protected]/dist/js/bootstrap.bundle.min.js"></script>
</body>

</html>
We have also added the code that will auto-click the Razorpay button and redirect them to the payment process. See there is no complicated process for Razorpay payment gateway integration in PHP code.
Bonus Step: Thank You page
When we successfully do the payment we expect a thank you page. So let’s quickly build a clean and beautiful looking “Thank You” page for our Razorpay PHP integration.
<!DOCTYPE html>
<html lang="en">

<head>
  <meta charset="UTF-8">
  <meta http-equiv="X-UA-Compatible" content="IE=edge">
  <meta name="viewport" content="width=device-width, initial-scale=1.0">
  <title>Thank You page</title>
  <link href="https://cdn.jsdelivr.net/npm/[email protected]/dist/css/bootstrap.min.css" rel="stylesheet">
  <link rel="stylesheet" href="pay.css">
</head>

<body>
  <div class="container parent_main">
    <div class="card" style="width: 30rem;">
      <div class="card-body">
        <h2>Thank you! Your Order is recieved and will be processed soon</h2>
      </div>
    </div>
  </div>


  <script src="https://cdn.jsdelivr.net/npm/[email protected]/dist/js/bootstrap.bundle.min.js"></script>
</body>

</html>
Feel Free to download the complete code at this GitHub Link as well:
And don’t forget this is all done on the test mode of Razorpay. To make it live you must generate a live Razorpay API key. The process is the same. Just replace the test API key with the live API key. That’s it!
In the Razorpay dashboard, you can now capture your payments and generate invoices.
Congrats! You have successfully implemented the Razorpay PHP integration. You can read more in Razorpay Docs.
Conclusion
We hope you enjoyed our guide on how to integrate the Razorpay PHP payment gateway. With this knowledge, we know you can make the most of your e-commerce venture by receiving online payments from your users.
So as you saw payment gateway integration PHP is easy to process as long as you follow this guide. And if you want to learn how to use different APIs in your project, then read this blog post.
Facing any troubles, feel free to comment and contact us at any time. We hope to reply as soon as possible. Stay happy and keep coding! Ta-da!
I couldn’t resist commenting. Exceptionally well written!