Introduction
To send emails with PHP SMTP PHPmailer is vital in most backend projects we develop. Situations will arise when the standard mail() PHP function won’t be sufficient to send emails.
Why? Because a lot of emails filter out the mail() function. It is used by spammers and hackers to spam their victims. Even hosting website has started to discourage the use of the mail() function. But what can you do to send simple emails?
Do you need a complex setup of the mail server? Spend money on a different solution?
No. You need the SMTP. And specifically Gmail Free SMTP and PHPMailer Library. Of course, I going to be using VS code for this project as well.
You can try this email sending script with a Localhost setup(Like Xampp or Wamp) as well as at a live server.
Let’s go in and learn in detail how these two tools can help you send spam-free emails with zero cost in PHP:
Step 1: What is PHPMailer?
According to the GitHub repo of PHPMailer.
PHPMailer is a full kit for email creation in PHP. It is simple and effective.
PHPMailer Github
PHPmailer let us configure any SMTP with PHP very easily and without little hassle. And its source code is completely free and always updated.
In this guide, I will show you two methods to install PHP SMTP PHPmailer. I recommend the first one since it’s easier and needs minimum configuration on your part:
Part 1:
To use the PHPmailer in PHP you can download my whole code:
<?php
use PHPMailer\PHPMailer\PHPMailer;
use PHPMailer\PHPMailer\Exception;

require 'vendor/autoload.php';

$mail = new PHPMailer();

try {
    $mail->SMTPDebug = 0;
    $mail->isSMTP();
    $mail->Host       = 'smtp.gmail.com;';
    $mail->SMTPAuth   = true;
    $mail->Username   = '[email protected]';   // Enter your gmail-id
    $mail->Password   = 'yourpassword';     // Enter your gmail app password that you generated
    $mail->SMTPSecure = 'tls';
    $mail->Port       = 587;

    $mail->setFrom('[email protected]', 'BeProblemSolver'); // This mail-id will be same as your gmail-id
    $mail->addAddress('[email protected]', 'Hey');      // Enter your reciever email-id

    $mail->isHTML(true);
    $mail->Subject = 'Mail Testing from PHPMailer';      // You email subject line
    $mail->Body    = 'Just some random text for body';   // Body of email here
    $mail->send();

    echo "Mail has been sent successfully!";
} catch (Exception $e) {
    echo "Message could not be sent. Mailer Error: {$mail->ErrorInfo}";
}
?> Note: In the above code, if you don’t provide proper files for “require ‘vendor/autoload.php“. Your script will fail. So don’t forget to download the whole code.
Also PHPMailer
Part 2:
Also, you can download the official PHPmailer. If downloading alone, use the Composer. It’s a simple and amazing tool to download third-party libraries like PHPmailer. And in the future, if any updates come, the composer makes it easy to implement.
After installing composer, you only need to run a simple command in CLI, and PHP mailer downloads and get installed for you.
composer require phpmailer/phpmailer
Now that we have set up our PHPmailer files for our mail sending script. The only thing left is how to configure Gmail SMTP. But what is exactly SMTP?
Step 2: Gmail Free SMTP to send email
SMTP if you check on Wikipedia or any networking book stands for Standard Mailing Transfer Protocol. But in a simple non-jargon way it is a protocol. Meaning it is a set of rules defined by which our emails are sent and received by everyone on the internet.
When we use Gmail SMTP we are essentially following protocols set by Gmail. This ensures our email is delivered 100% guaranteed, without being blocked by different hosting providers and spam filters of modern email providers.
Why Gmail? Because it’s free and reliable. And unless you are planning to bulk mail a lot, you don’t need to buy a mail server yet.
So let’s jump to configuring Gmail SMTP.
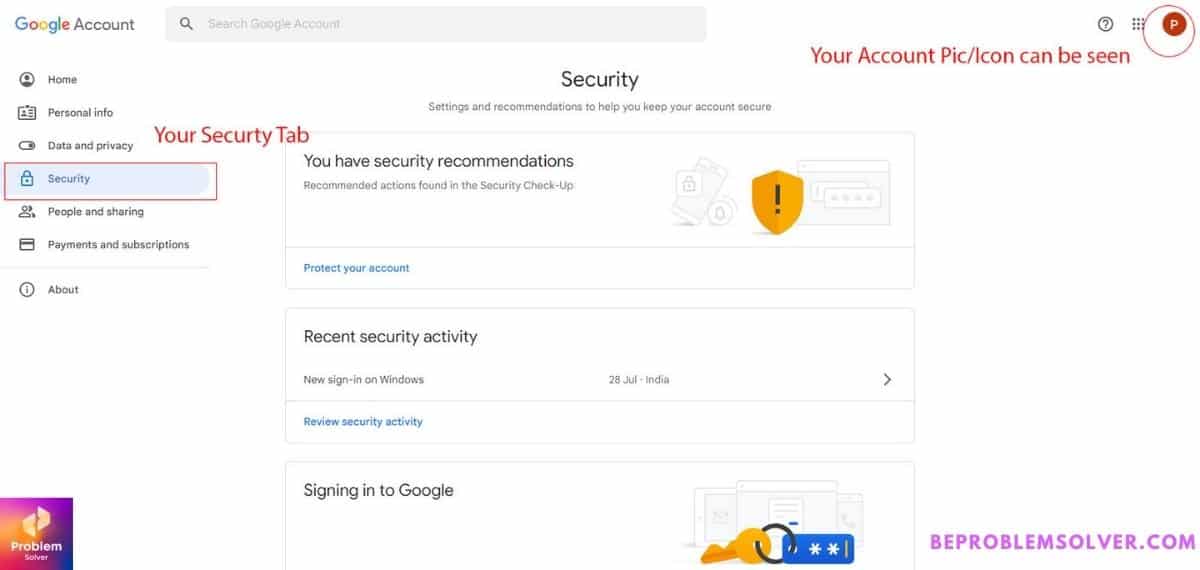
1. Log into your Gmail account and go to Security Tab.

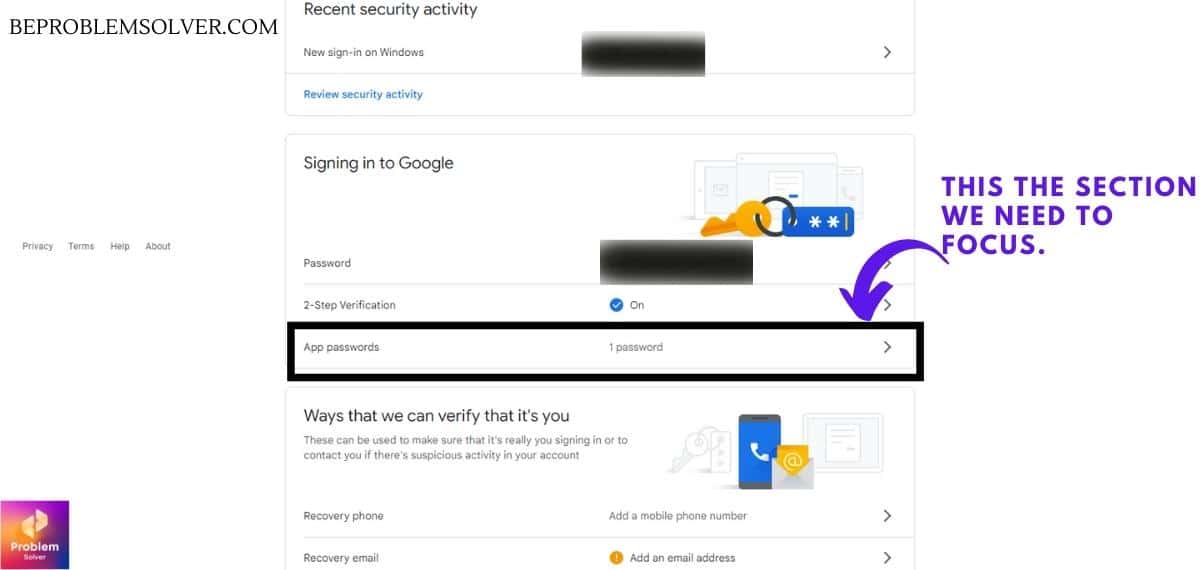
2. Next step we stay on this page and scroll down to the section of signing in Google and check if you have a section with “App Passwords” active.

3. If you are brand new to working with email localhost PHP and PHPmailer example in general. You might not have that tab active. If so, then just activate your 2-Step-Verification. And then you will get the option to create an “App Password”.
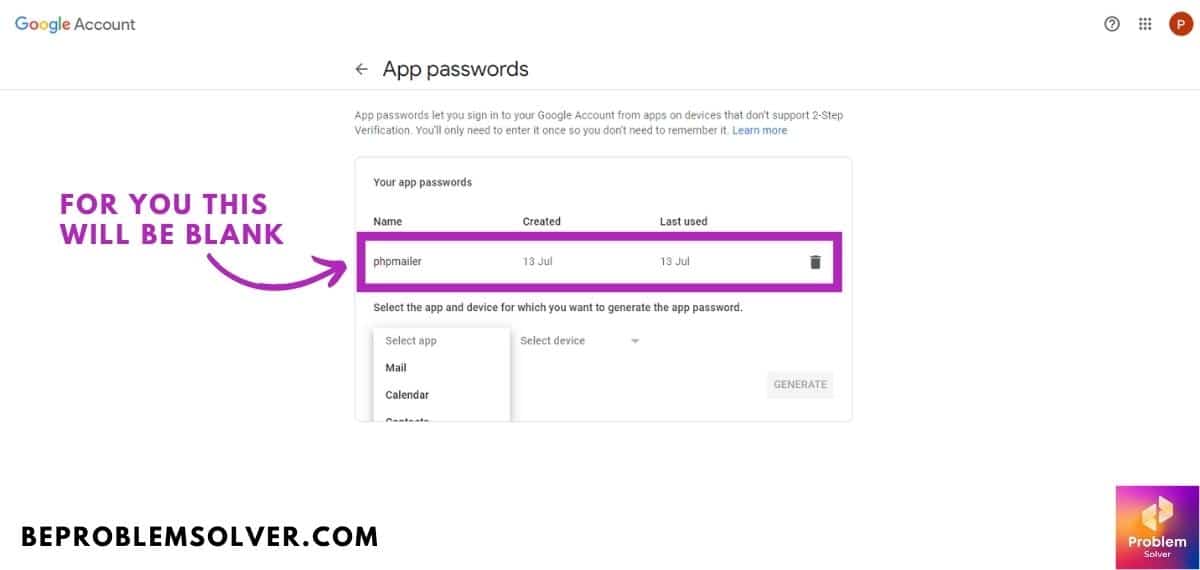
4. Now we click the app password section and redirect to a new page by Google. You may be prompted to verify your Gmail password at this point. And then you get below screen.

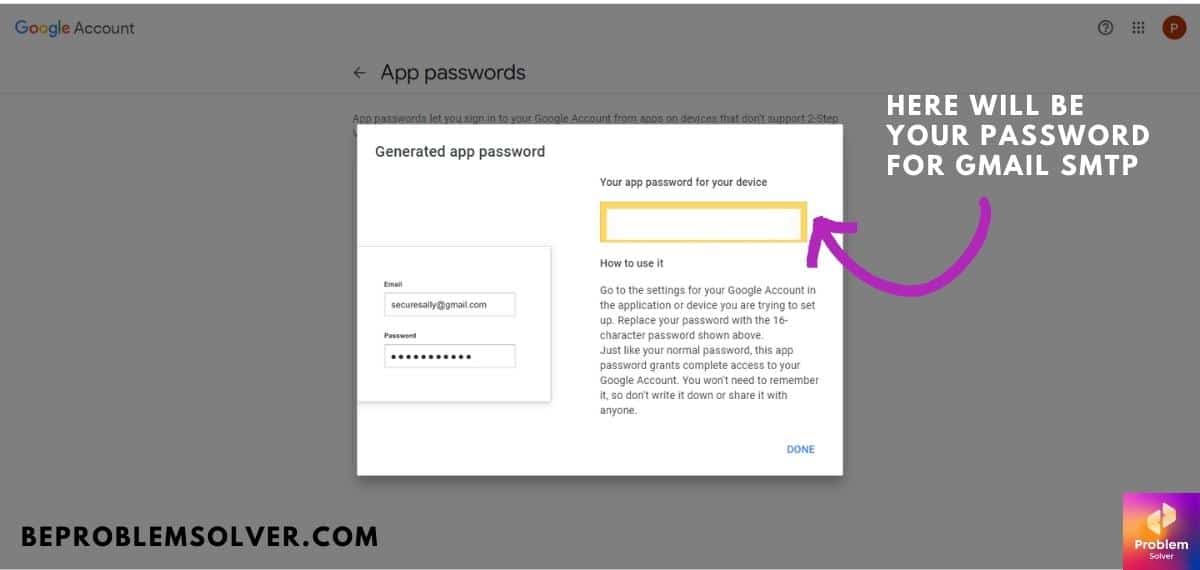
5. Now all we go to “Select App” and choose a “Custom name“. I chose “PHPMailer smtpsecure” for simplicity. And then you get your new password for this app you created.

6. Now we paste this password into our email with the PHPMailer code block.
Now we are ready to send emails with PHP SMTP PHPMailer.
Note: In the past, you could use your Gmail id password directly in PHPMailer. But recently Google has updated its policy regarding Third-Party Apps like our PHPMailer SMTP. So making enabling Two-Factor Authentication and generating App-Password is compulsory.
Conclusion
As you could see using PHPMailer in configuration with Gmail’s Free SMTP is easy and secure. However, be warned that Google can block your SMTP if you do malicious activity. Even sending bulk spammy emails for promotion tends to block Gmail-free SMTP.
PHPMailer is fast and responsive. You will see zero lag, unlike the PHP mail() function. And you can easily integrate it into any project. You can even test PHPMailer on Localhost. It works smoothly, though you have set up Gmail SMTP in the “php.ini” file.
On the live server, you run PHPMailer to send emails without any setup. Just need to have PHP support which most hosting providers do. If you feel stuck at any part, feel free to contact me or comment below.
You can also check out our post where we integrated PHPMailer in a Registration form in HTML.
Feel Free to check out my other posts. Like how to build User Login in PHP.
Be Problem Solver is saying Ta-Da! For now. Happy Coding guys & gals.


Have you ever thought about including a little bit more than just your articles?
I mean, what you say is important and all. But imagine if you added some great
visuals or videos to give your posts more, “pop”! Your content is excellent but with images and
video clips, this site could definitely be one of the greatest in its field.
Great blog!