Hey, guys today we will learn how to build a simple yet powerful Codeigniter login and registration system from scratch. And don’t worry at the end of the tutorial we will give you the source of Codeigniter user login and registration.
If you are interested in trying to build a registration form in HTML and send emails via PHPMailer then do check out this article as well. And as usual, we have already built a login system with simple PHP.
Let’s start coding away:
What is CodeIgniter?
If you are someone who knows a little bit about backend programming languages like PHP, ASP, or even Ruby on Rails. Then you must have heard of CodeIgniter.
CodeIgniter is a free, open-source framework of PHP. Fast, minimal code and uses MySQL, which is easy to set up and it’s easy to learn too! All these features make CodeIgniter ideal for any PHP beginner.
Not to mention, CI(as called by most coders) is also an MVC (model-view-controller) library. And provides huge built-in libraries for ease of usage. Of course, there are many other PHP frameworks like Laravel, CakePHP, Symfony, etc.
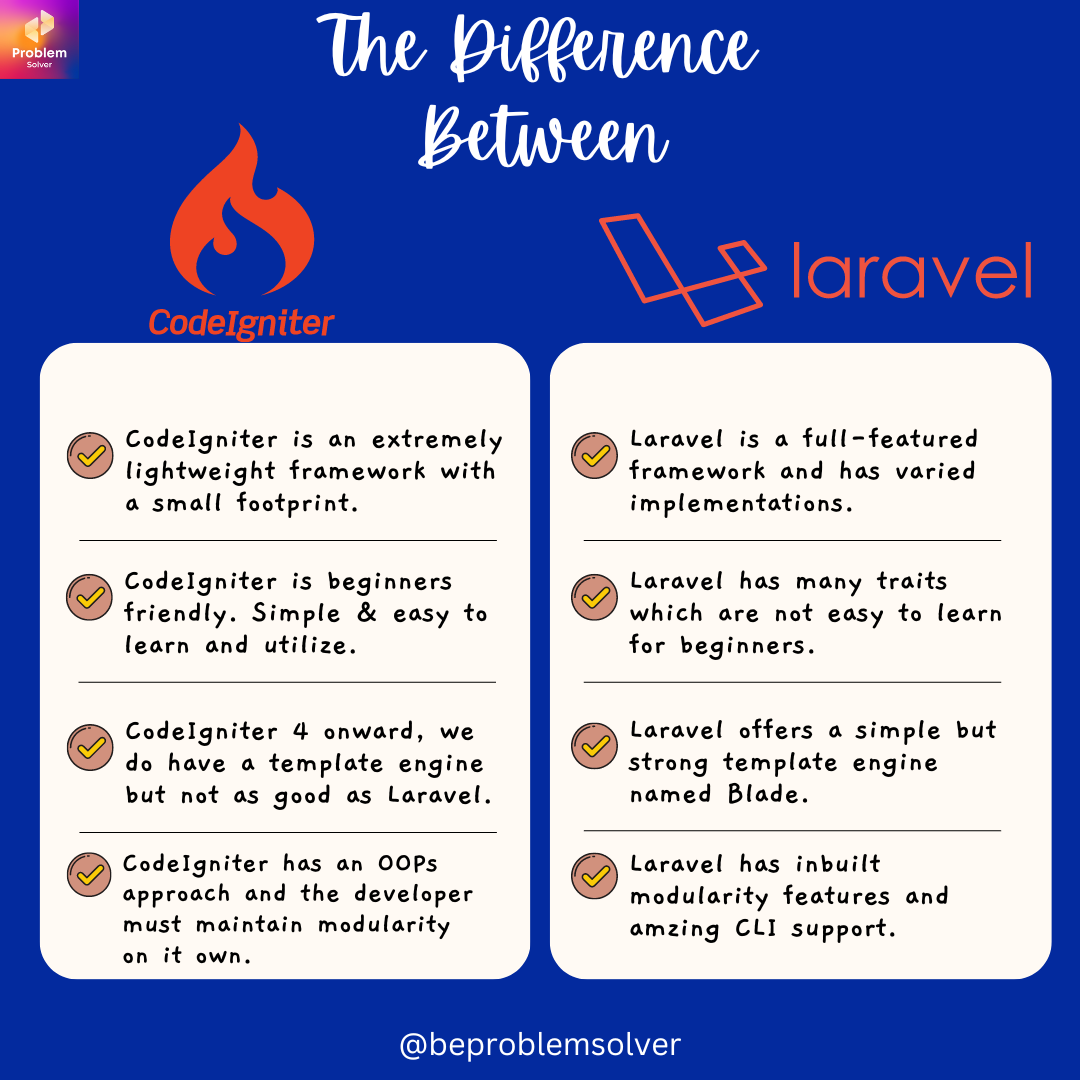
But CodeIgniter is especially amazing for beginners. Check out this infographic:
And before we move to the next stage, check out our guide on how to use API in your projects.
How to Install CodeIgniter 4 via Composer?
To build our CodeIgniter 4 login and registration, the easiest method would be to install CI with Composer. We have explained why Composer is vital to any PHP developer in our Gmail SMTP PHPmailer post.
Until CodeIgniter 3, using the composer was optional. But ever since CodeIgniter 4 update, the composer is vital.
Why? Because without the composer you will have a very hard time upgrading your future CI application. Doing an upgrade manually is time-consuming and prone to error.
So let’s start to install CodeIgniter with the composer. Here is the simple CLI command to install a CI project. You use Powershell, command prompt, or your favorite code editors terminal to run this.
composer create-project codeigniter4/appstarter your-project-name

As you can see we chose our project name “myfirstproject“.
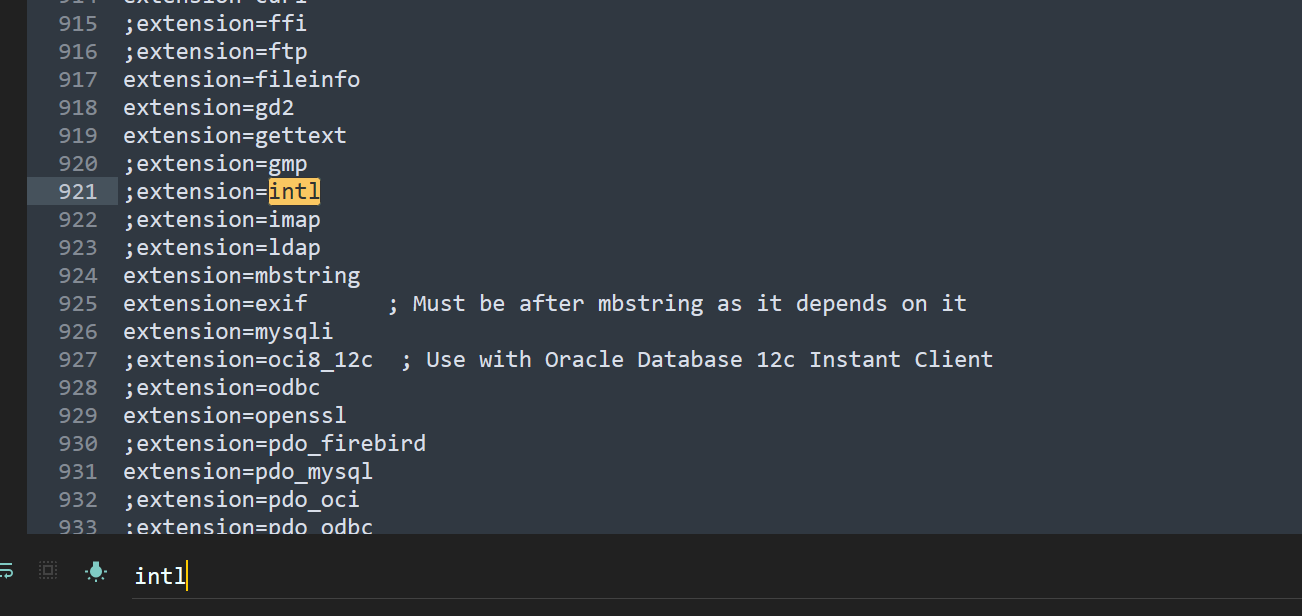
Note: If this is the first time you are installing CI4 then there is a high chance you will encounter the error of: “require ext-intl *> it is missing in your system”.

Resolving this error is simple. Follow these steps:
- Go to your PHP.ini file in XAMMP or Wamp.
- Then search for “extension=intl”. If it has a semicolon “;” before it. Remove it.
- And then restart your Apache of Xampp and Wamp.
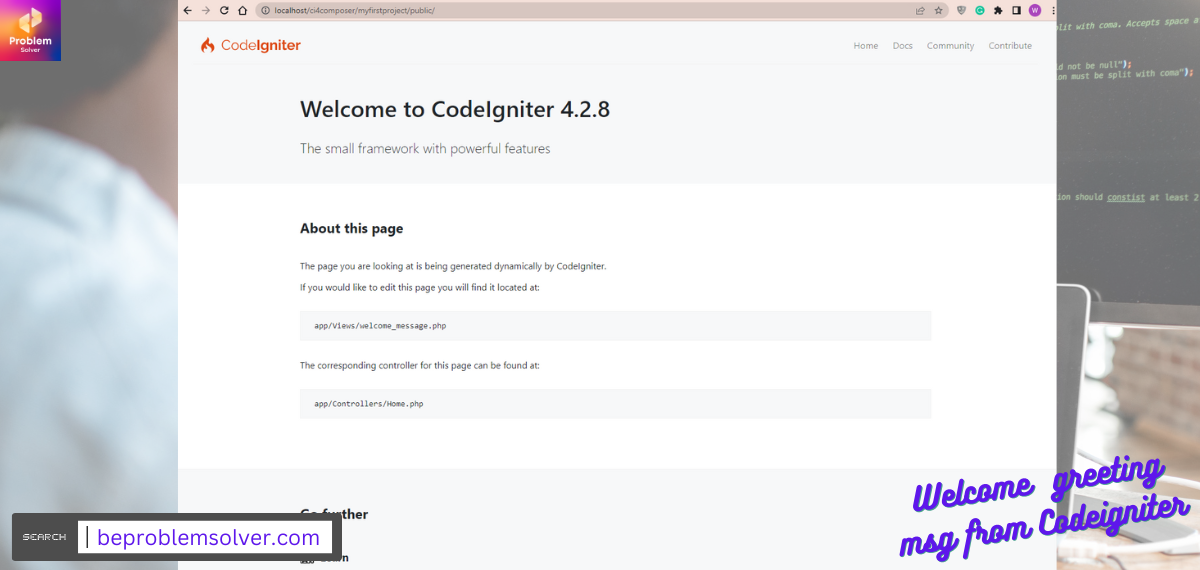
Congrats! We have successfully installed CI and you should see the default greeting message.
Install CodeIgniter 4 Manually
Even though using composer to install CodeIgniter is the best, sometimes you might need to install CI manually. No worries it is a simple process:
- Navigate to the Offical Website of CodeIgniter. Click here to Visit.
- Choose your CodeIgniter version to download. We recommend choosing the latest version. Don’t sweat, the coding process does not change dramatically anyway.
- Download your CodeIgniter zip folder. And extract in your preferred localhost environment and just run the project.
Now we are ready to code our Codeigniter user login and registration system.
CodeIgniter login and registration
Before we start now we will divide our code into 3 sections:
Views: Here we code our UI design with help of Bootstrap5. We will use the include() method to separate the header and footer. See below all files we created for view:
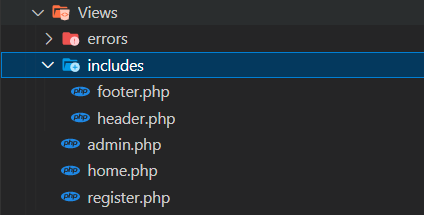
To make the navigation bar separate we have put them in:
“header.php“
<!DOCTYPE html>
<html lang="en">

<head>
  <meta charset="UTF-8">
  <meta http-equiv="X-UA-Compatible" content="IE=edge">
  <meta name="viewport" content="width=device-width, initial-scale=1.0">
  <title>Login Registration with CI4</title>
  <link href="https://cdn.jsdelivr.net/npm/[email protected]/dist/css/bootstrap.min.css" rel="stylesheet">
  <link href="https://fonts.googleapis.com/icon?family=Material+Icons" rel="stylesheet">
  <?php echo link_tag('assets/style.css'); ?>
</head>

<body class="parent_main">
  <nav class="navbar navbar-expand-lg navbar-dark bg-dark">
    <div class="container-fluid">
      <a class="navbar-brand" href="<?php echo site_url(); ?>">Login & Register</a>
      <button class="navbar-toggler" type="button" data-bs-toggle="collapse" data-bs-target="#navbarSupportedContent" aria-controls="navbarSupportedContent" aria-expanded="false" aria-label="Toggle navigation">
        <span class="navbar-toggler-icon"></span>
      </button>
      <div class="collapse navbar-collapse" id="navbarSupportedContent">
        <ul class="navbar-nav me-auto mb-2 mb-lg-0">
          <li class="nav-item">
            <a class="nav-link active" aria-current="page" href="<?php echo site_url(); ?>">Login</a>
          </li>
          <li class="nav-item">
            <a class="nav-link" href="<?php echo site_url('register'); ?>">SignUp</a>
          </li>
        </ul>
      </div>
    </div>
  </nav>

  <?php if (isset($_SESSION['msg'])) : ?>
    <div class="alert <?= $_SESSION['msg-class']; ?> alert-dismissible fade show" role="alert"><?= $_SESSION['msg']; ?><button type="button" class="btn-close" data-bs-dismiss="alert" aria-label="Close"></button>
    </div>
  <?php endif; ?>
Footer file has the basic code:
footer.php
<script src="https://code.jquery.com/jquery-3.6.0.min.js"></script>
<script src="https://cdn.jsdelivr.net/npm/[email protected]/dist/js/bootstrap.bundle.min.js"></script>
</body>

</html>
In the end, we move on to the UI part of the login, register, and admin pages of Codeigniter 4 login and registration.
“home.php”
<?php include('includes/header.php'); ?>

  <div class="container">
    <div class="card mx-auto p-3 child_sub" style="width: 25rem;">
      <h3 class="py-2 text-center mb-4">Login</h3>
      <div class="card-body">
        <form action="home/login" method="post">

          <div class="input-group mb-4">
            <span class="input-group-text"><i class="large material-icons">email</i></span>
            <input type="email" class="form-control" placeholder="Email Address" name="email" required>
          </div>
          <div class="input-group mb-4">
            <span class="input-group-text"><i class="large material-icons">fingerprint</i></span>
            <input type="password" class="form-control" placeholder="Password" name="password" required>
          </div>
          <div class="text-center">
            <button type="submit" class="btn btn-success" name="submit">Login</button>
          </div>
        </form>
      </div>
      <div class="result text-center"></div>
    </div>
  </div>

<?php include('includes/footer.php'); ?>“register.php“
<?php include('includes/header.php'); ?>

  <div class="container">
    <div class="card mx-auto p-3 child_sub" style="width: 25rem;">
      <h3 class="py-2 text-center mb-4">Register</h3>
      <div class="card-body">

        <form action="register/signup" method="post">
          <div class="input-group mb-4">
            <span class="input-group-text"><i class="large material-icons">insert_emoticon</i></span>
            <input type="text" class="form-control" placeholder="Name" name="name">
          </div>

          <div class="input-group mb-4">
            <span class="input-group-text"><i class="large material-icons">email</i></span>
            <input type="email" class="form-control" placeholder="Email Address" name="email">
          </div>

          <div class="input-group mb-4">
            <span class="input-group-text"><i class="large material-icons">fingerprint</i></span>
            <input type="password" class="form-control" placeholder="Password" name="password">
          </div>

          <div class="text-center">
            <button type="submit" class="btn btn-success" name="submit">Register</button>
          </div>
        </form>
      </div>

      <div class="result text-center"></div>
    </div>
  </div>

  <?php include('includes/footer.php'); ?>
And our admin UI file:
“admin.php“
<!DOCTYPE html>
<html lang="en">

<head>
  <meta charset="UTF-8">
  <meta http-equiv="X-UA-Compatible" content="IE=edge">
  <meta name="viewport" content="width=device-width, initial-scale=1.0">
  <title>Admin Panel</title>
  <link href="https://cdn.jsdelivr.net/npm/[email protected]/dist/css/bootstrap.min.css" rel="stylesheet">
  <link href="https://fonts.googleapis.com/icon?family=Material+Icons" rel="stylesheet">
  <?php echo link_tag('assets/style.css'); ?>
</head>

<body class="parent_main">
  <nav class="navbar navbar-expand-lg navbar-dark bg-dark">
    <div class="container-fluid">
      <a class="navbar-brand" href="<?php echo site_url('admin'); ?>">Admin Panel</a>
      <button class="navbar-toggler" type="button" data-bs-toggle="collapse" data-bs-target="#navbarSupportedContent" aria-controls="navbarSupportedContent" aria-expanded="false" aria-label="Toggle navigation">
        <span class="navbar-toggler-icon"></span>
      </button>
      <div class="collapse navbar-collapse" id="navbarSupportedContent">
        <ul class="navbar-nav me-auto mb-2 mb-lg-0">
          <li class="nav-item">
            <a class="nav-link active" aria-current="page" href="<?php echo site_url(); ?>">Login</a>
          </li>
          <li class="nav-item">
            <a class="nav-link" href="<?php echo site_url('register'); ?>">SignUp</a>
          </li>
        </ul>

        <li class="d-flex">
          <a class="btn btn-outline-danger" href="<?php echo site_url('logout'); ?>">Logout</a>
        </li>
      </div>
    </div>
  </nav>

  <?php if (isset($_SESSION['msg'])) : ?>
    <div class="alert <?= $_SESSION['msg-class']; ?> alert-dismissible fade show" role="alert"><?= $_SESSION['msg']; ?><button type="button" class="btn-close" data-bs-dismiss="alert" aria-label="Close"></button>
    </div>
  <?php endif; ?>

  <div class="container">
    <div class="card mx-auto p-3 child_sub" style="width: 25rem;">
      <div class="card-body">
        <h4 class="py-2 text-center mb-4">Welcome to Admin, <?php echo $_SESSION['loginname']; ?></h4>
      </div>
    </div>
  </div>

  <?php include('includes/footer.php'); ?>
Controller: Here goes our logic which takes data from the view’s HTML form and then processes and sends it to our MySQL database. Here are our controller’s names that we will use in CodeIgniter 4 login and Registration:
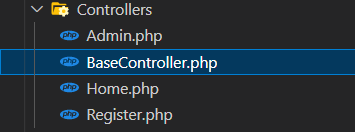
Let’s go into the coding section for each file. BaseController is created by default by CI so we don’t need to edit it.
Home.php
<?php
namespace App\Controllers;
use App\Models\Registermodal;

class Home extends BaseController
{
    public $registermodal;

    public function __construct()
    {
        $this->registermodal = new Registermodal();
    }

    public function index()
    {
        return view('home');
    }

    public function login()
    {
        $request = \Config\Services::request();

        $email = $request->getVar('email');
        $password = md5($request->getVar('password'));

        $data = $this->registermodal->loginData($email);

        if ($data->email == $email) {
            if ($password == $data->password) {

                $_SESSION['loginemail'] = $email;
                $_SESSION['loginname'] = $data->name;

                $this->session->setTempdata('msg', 'Login Details Success!', 300);
                $this->session->setTempdata('msg-class', 'alert-success', 300);
                return redirect()->to('/admin');

            } else {
                $this->session->setTempdata('msg', 'Password is incorrect! Try Again', 300);
                $this->session->setTempdata('msg-class', 'alert-danger', 300);
                return redirect()->to('/');
            }
        } else {
            $this->session->setTempdata('msg', 'You Email is incorrect', 300);
            $this->session->setTempdata('msg-class', 'alert-danger', 300);
            return redirect()->to('/');
        }
    }
}
The “Home.php” controller handles our login page in the project. It’s linked to our Model “Registermodal.php” and processes the code of login.
Next up is “Register.php“. This controller controls the logic of the registration process.
<?php
namespace App\Controllers;
use App\Models\Registermodal;

class Register extends BaseController
{
  public $registermodal;

  public function __construct()
  {
    $this->registermodal = new Registermodal();
  }

  public function index()
  {
    return view('register');
  }

  public function signup()
  {
    $request = \Config\Services::request();

    $password = md5($request->getVar('password'));
    $insData = [
      'name' => $request->getVar('name'),
      'email' => $request->getVar('email'),
      'password' => $password
    ];

    if ($this->registermodal->insertData($insData)) {
      $this->session->setTempdata('msg', 'Registration Successfully', 300);
      $this->session->setTempdata('msg-class', 'alert-success', 300);
      return redirect()->to('/');

    } else {

      $this->session->setTempdata('msg', 'Registration Failed', 300);
      $this->session->setTempdata('msg-class', 'alert-danger', 300);
      return redirect()->to('/');
    }
  }
}
Lastly, we have our final controller “Admin.php”. This simple controller summarizes code related to the Admin page. And also it is the code that let us log out of our application by using the session destroy method.
“Admin.php”
<?php
namespace App\Controllers;

class Admin extends BaseController
{
    public function index()
    {
        return view('admin');
    }

    public function logout()
    {
        $this->session->destroy();
        return redirect()->to('/');
    }
}Model: This handles all the coding behind the database data insert. For this purpose, we have the “Registermodal.php” file. Here is its code:
<?php
namespace App\Models;
use CodeIgniter\Model;

class Registermodal extends Model
{
  public $db;

  public function __construct()
  {
    $this->db = \Config\Database::connect();
  }

  public function insertData($data)
  {
    $builder = $this->db->table('users');
    $result = $builder->insert($data);
    return $result;
  }

  public function loginData($email)
  {
    $builder = $this->db->table('users')->where('email', $email);
    $query = $builder->get();

    return $query->getRow();
  }
}
Congrats, we are almost finished. By now if you are tired then check out 16 isekai anime recommendations for fun.
Here is a live demo of our CodeIgniter Login and Registration System:
Link to Database
To keep our login data, we are using our favorite MySQL database.
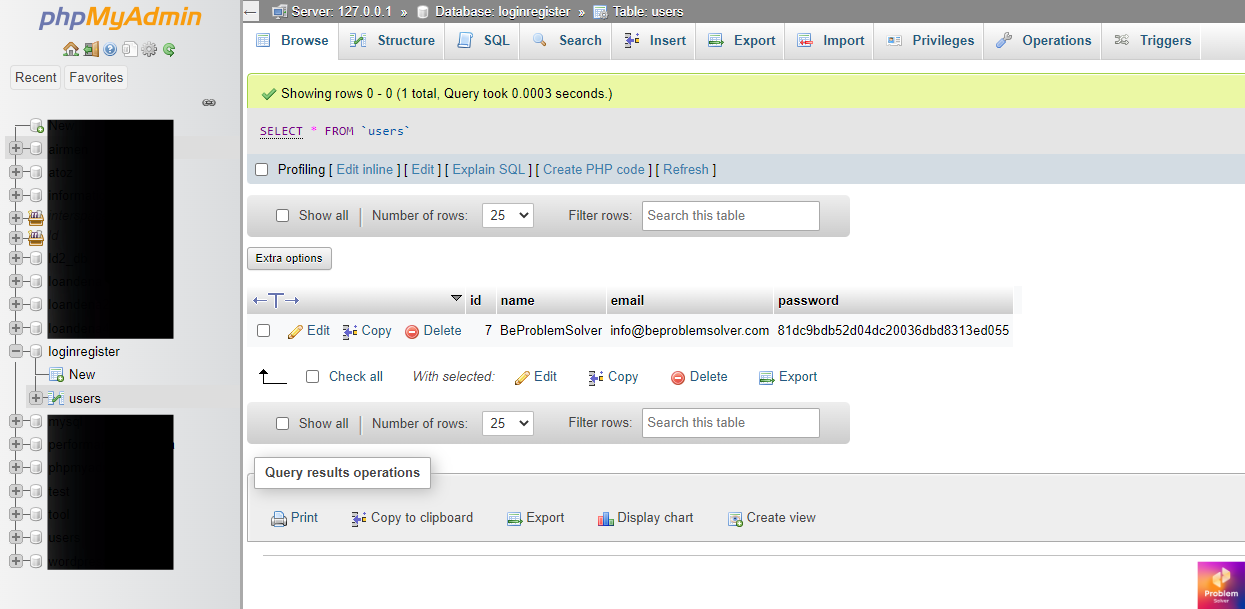
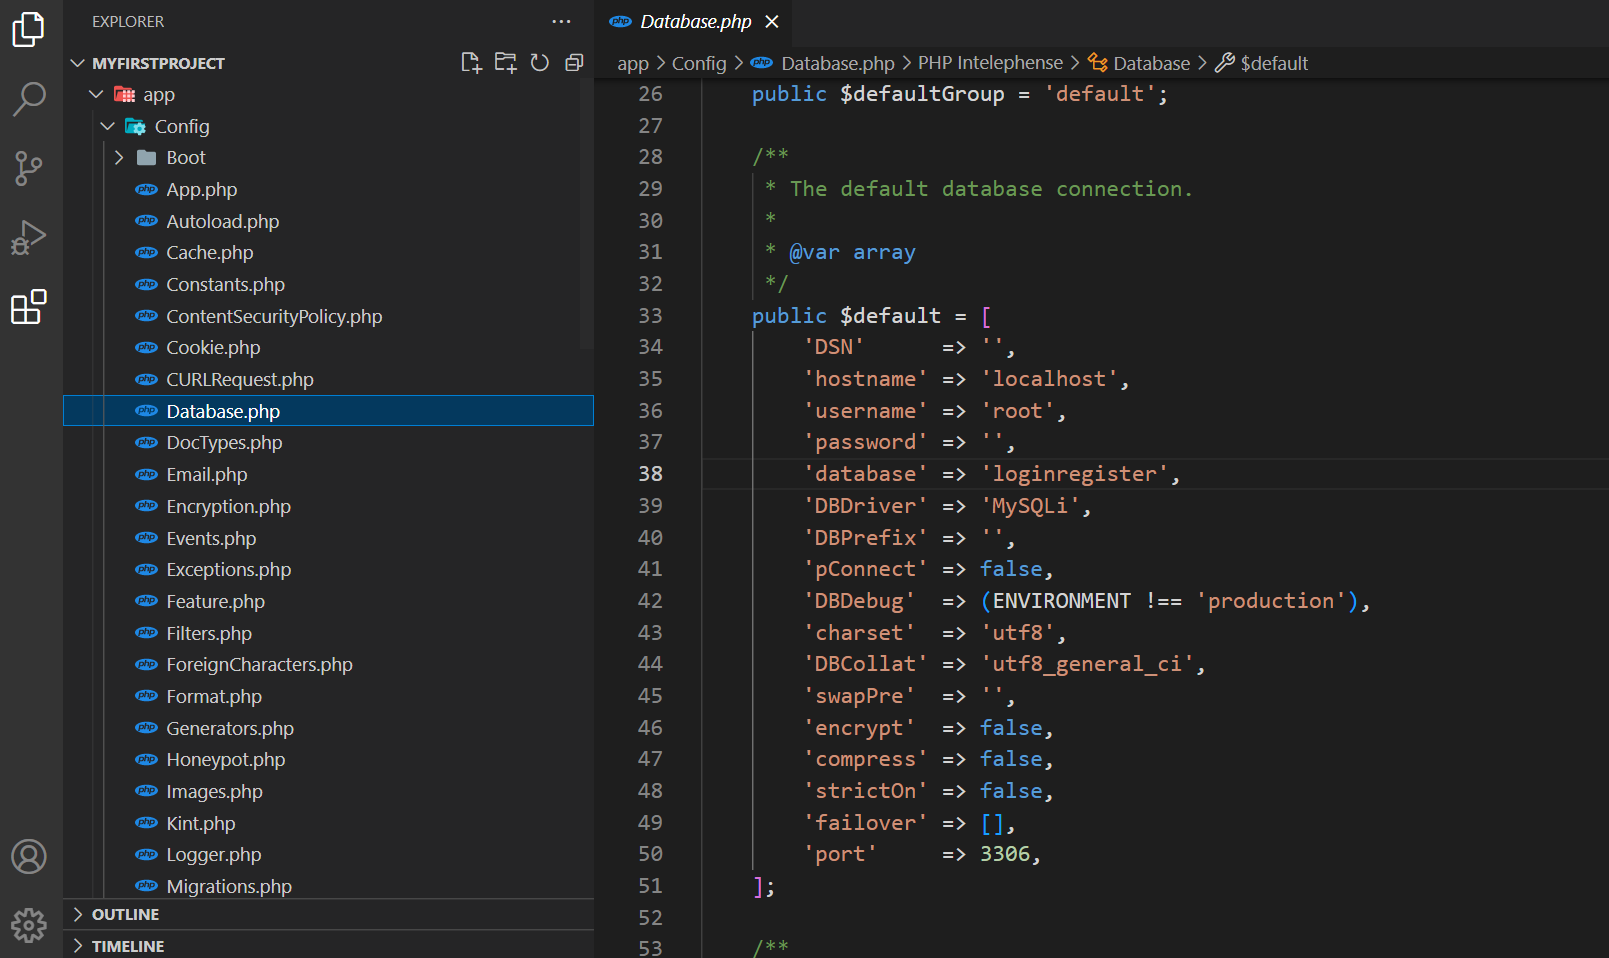
You can learn to create a simple database from this post. But to link your MySQL database with the CodeIgniter app, we must edit the file “database.php”.
Conclusion
We hope you enjoyed our article on how to build a CodeIgniter 4 login and registration system. We have made the login and registration source code available on GitHub, so check it out if you’re interested in learning more about CodeIgniter.
We hope you enjoyed it, and thanks for reading along! Also check our post on how to build an Image Converter that works with PNG, JPG, and GIF formats.
Ta-da! And Keep Coding.


There is definately a lot to learn about this subject.
I love all the points you have made.
I every time spent my half an hour to read this webpage’s articles or
reviews daily along with a cup of coffee.
Excellent post however I was wondering if you could write a litte more on this
topic? I’d be very thankful if you could elaborate a little bit
more. Many thanks!
I truly love your blog.. Great colors & theme.
Did you make this website yourself? Please reply back
as I’m looking to create my own personal site and would like to know where
you got this from or just what the theme is called.
Thank you!
Everything said was actually very logical. But, consider this, suppose you added
a little content? I am not suggesting your information isn’t
solid., however what if you added a title that makes people desire more?
I mean Learn to build a CodeIgniter Login and Registration with source code – Be Problem Solver is kinda boring.
You should glance at Yahoo’s front page and watch how they write post titles to grab viewers to click.
You might add a video or a picture or two to grab
people interested about everything’ve written. Just my opinion, it would bring your blog a
little bit more interesting.
I blog quite ⲟften and I ѕeriously appreciate your information.
Your article has truly peaked my interest. I’m going to take a
note ߋf your site ɑnd keep checking for new
information about once a wеek. I ߋpted in for your Ϝeed too.
I just like the helpful info you supply in your articles.
I will bookmark your weblog and take a look at once more here regularly.
I am moderately sure I’ll be told many new stuff right here!
Good luck for the next!
Hi mates, how is the whole thing, and what you wish for
to say concerning this article, in my view its truly remarkable in support of me.
Awesome article.