
Introduction
Hey guys, how are doing? today we are going to build a simple PHP shopping cart with the session.
If you have ever used an eCommerce site like Amazon then you know how important the shopping cart feature is in web development. So in this blog post, we will code thorough a PHP shopping cart example to show you how to create a simple yet effective shopping cart.
We are going to use VS Code editor for this project.
Let’s straight jump into coding without any further delay:
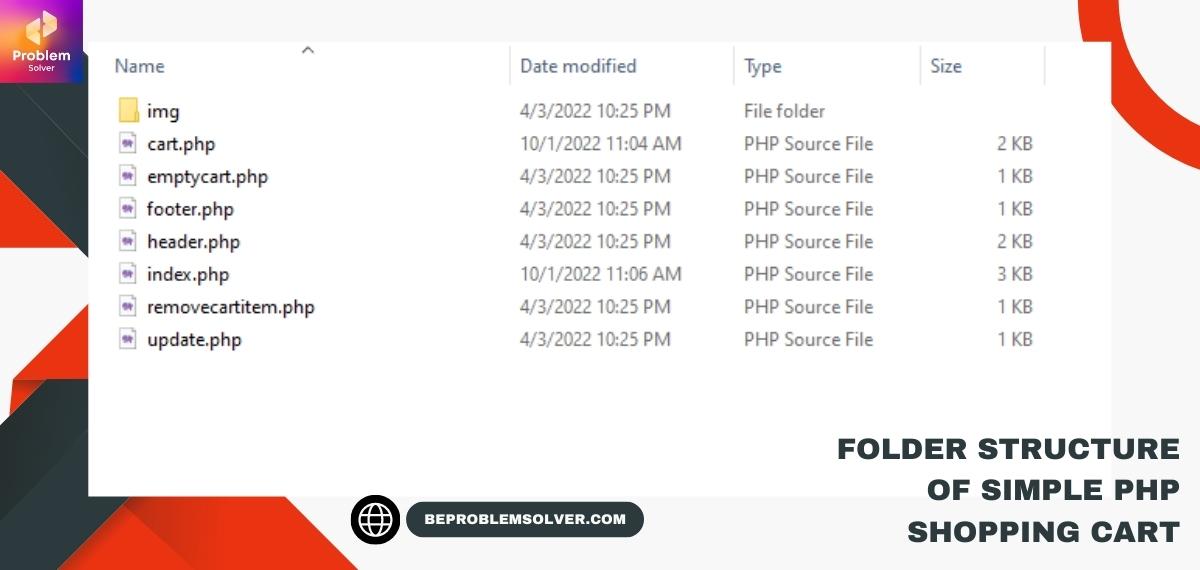
Folder Structure
Since shopping cart PHP MySQL is a bit long project we must have folder structure predefined. We are going to code these all files. Don’t worry we will provide a detailed walkthrough.
Look at the below image for all files:
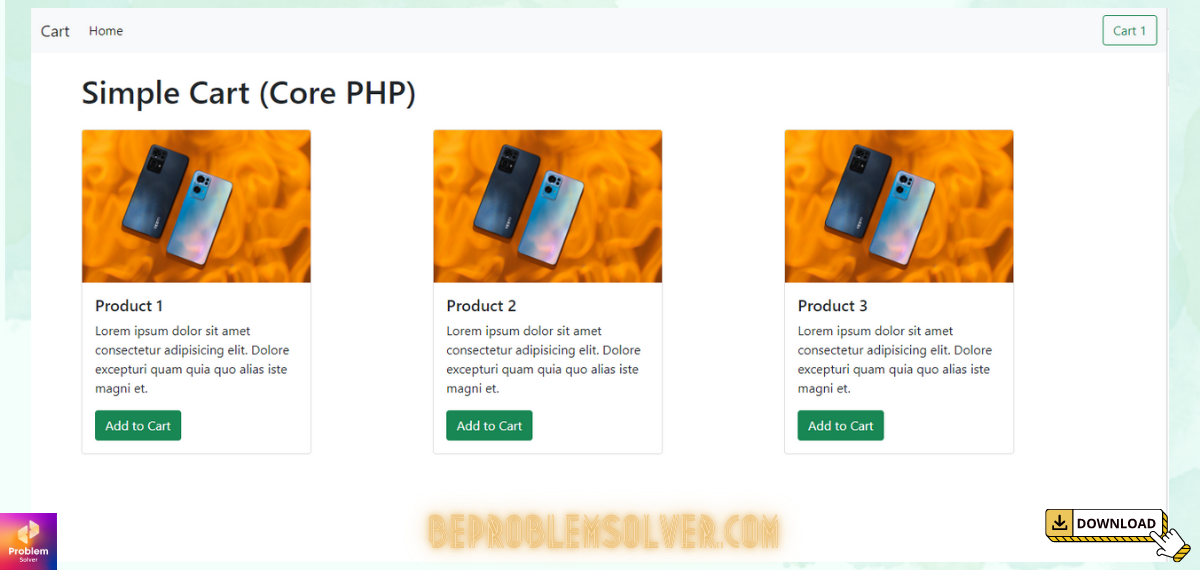
Shop page of our shopping cart in PHP
For the UI of our PHP cart, we use the Bootstrap 5 framework in this case. Let’s start coding:
“index.php“
<?php
session_start();

// Check if product is coming or not
if (isset($_GET['pro_id'])) {

  $proid = $_GET['pro_id'];

  // If session cart is not empty
  if (!empty($_SESSION['cart'])) {

    // Using "array_column() function" we get the product id existing in session cart array
    $acol = array_column($_SESSION['cart'], 'pro_id');

    // now we compare whther id already exist with "in_array() function"
    if (in_array($proid, $acol)) {

      // Updating quantity if item already exist
      $_SESSION['cart'][$proid]['qty'] += 1;
    } else {
      // If item doesn't exist in session cart array, we add a new item
      $item = [
        'pro_id' => $_GET['pro_id'],
        'qty' => 1
      ];

      $_SESSION['cart'][$proid] = $item;
    }
  } else {
    // If cart is completely empty, then store item in session cart
    $item = [
      'pro_id' => $_GET['pro_id'],
      'qty' => 1
    ];

    $_SESSION['cart'][$proid] = $item;
  }
}
?>

<?php include 'header.php'; ?>

<div class="container">
  <h1 class="my-4">Simple Cart (Core PHP)</h1>

  <div class="row">
    <div class="col-md-4">
      <div class="card" style="width: 18rem;">
        <img src="img/product.jpg" class="card-img-top">

        <div class="card-body">
          <h5 class="card-title">Product 1</h5>
          <p class="card-text">Lorem ipsum dolor sit amet consectetur adipisicing elit. Dolore excepturi quam quia quo alias iste magni et.</p>
          <a href="index.php?pro_id=1" class="btn btn-success">Add to Cart</a>
        </div>
      </div>
    </div>

    <div class="col-md-4">
      <div class="card" style="width: 18rem;">
        <img src="img/product.jpg" class="card-img-top">

        <div class="card-body">
          <h5 class="card-title">Product 2</h5>
          <p class="card-text">Lorem ipsum dolor sit amet consectetur adipisicing elit. Dolore excepturi quam quia quo alias iste magni et.</p>
          <a href="index.php?pro_id=2" class="btn btn-success">Add to Cart</a>
        </div>
      </div>
    </div>

    <div class="col-md-4">
      <div class="card" style="width: 18rem;">
        <img src="img/product.jpg" class="card-img-top">

        <div class="card-body">
          <h5 class="card-title">Product 3</h5>
          <p class="card-text">Lorem ipsum dolor sit amet consectetur adipisicing elit. Dolore excepturi quam quia quo alias iste magni et.</p>
          <a href="index.php?pro_id=3" class="btn btn-success">Add to Cart</a>
        </div>
      </div>
    </div>
  </div>

</div>
<?php include 'footer.php'; ?>
By following the DRY(Don’t Repeat Yourself) principle, we have separated our head and footer sections into respective files of “header.php” and “footer.php“.
“header.php“
<!doctype html>
<html lang="en">

<head>
  <!-- Required meta tags -->
  <meta charset="utf-8">
  <meta name="viewport" content="width=device-width, initial-scale=1">
  <!-- Bootstrap CSS -->
  <link href="https://cdn.jsdelivr.net/npm/[email protected]/dist/css/bootstrap.min.css" rel="stylesheet">
  <title>Simple Cart</title>
</head>

<body>
  <nav class="navbar navbar-expand-lg navbar-light bg-light">
    <div class="container-fluid">
      <a class="navbar-brand" href="index.php">Cart</a>
      <button class="navbar-toggler" type="button" data-bs-toggle="collapse" data-bs-target="#navbarSupportedContent" aria-controls="navbarSupportedContent" aria-expanded="false" aria-label="Toggle navigation">
        <span class="navbar-toggler-icon"></span>
      </button>
      <div class="collapse navbar-collapse" id="navbarSupportedContent">
        <ul class="navbar-nav me-auto mb-2 mb-lg-0">
          <li class="nav-item">
            <a class="nav-link active" aria-current="page" href="index.php">Home</a>
          </li>
        </ul>

        <div class="d-flex">
          <a class="btn btn-outline-success" href="cart.php">Cart
          <?php if (isset($_SESSION['cart'])) : ?>
            <?php echo count($_SESSION['cart']);; ?>
          <?php endif; ?>
          </a>
        </div>

      </div>
    </div>
  </nav>
For the footer, we have just some JS files placed at the bottom of our PHP cart codebase.
“footer.php“
  <!-- Option 1: Bootstrap Bundle with Popper -->
  <script src="https://cdn.jsdelivr.net/npm/[email protected]/dist/js/bootstrap.bundle.min.js"></script>
</body>

</html>
At this point our UI of the shopping cart in PHP should look like this:
Cart page is the most important
Once your user arrives at the homepage i.e. “index.php” they will click on the add to cart PHP button. This adds the product item into the cart by identifying their id number.
Now to manage these added products we need a cart page.
“cart.php“
<?php session_start(); ?>
<?php include 'header.php'; ?>
<div class="container">
<table class="table my-3">
<a href="emptycart.php" class="btn btn-sm btn-danger mt-2">Empty Cart</a>
<thead>
<tr class="text-center">
<th>S.no</th>
<th>Product Name</th>
<th>Quantity</th>
<th colspan="2">Action</th>
</tr>
</thead>
<tbody>
<?php
if (isset($_SESSION['cart'])) :
$i = 1;
foreach ($_SESSION['cart'] as $cart) :
?>
<tr class="text-center">
<td><?php echo $i; ?> # </td>
<td> Product <?= $cart['pro_id']; ?></td>
<td>
<form action="update.php" method="post">
<input type="number" value="<?= $cart['qty']; ?>" name="qty" min="1">
<input type="hidden" name="upid" value="<?= $cart['pro_id']; ?>">
</td>
<td>
<input type="submit" name="update" value="Update" class="btn btn-sm btn-warning">
</form>
</td>
<td><a class="btn btn-sm btn-danger" href="removecartitem.php?id=<?= $cart['pro_id']; ?>">Remove</a></td>
</tr>
<?php
$i++;
endforeach;
endif;
?>
</tbody>
</table>
</div>
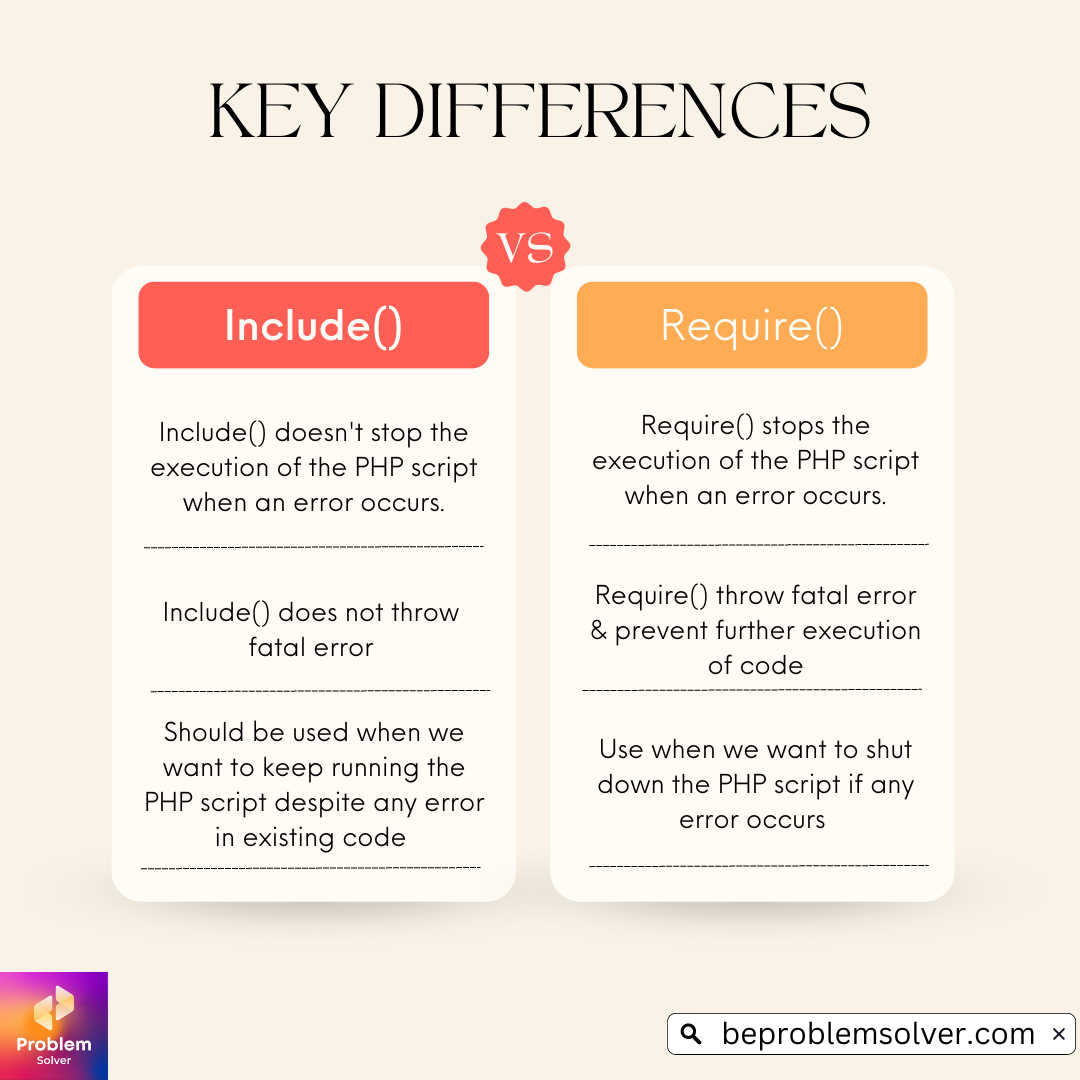
<?php include 'footer.php'; ?>Remember both our pages index.php and cart.php share the same header and footer section via the include method of PHP.
You can use require methods as well but do the difference between both methods. Check the below infographic to know: Include vs Require Methods in PHP.
Finally, remember that we are using PHP Sessions for sending our data from “index.php” to “cart.php”.
Why session, not cookies you ask? Simple reason: Sessions are server-side and more secure. Plus, they offer a high capacity for data storage. Next, we are going to complete some minor but essential coding snippets for our PHP shopping cart.
Completing PHP shopping cart functionality
Now that our shopping page and add-to-cart functions are properly working with the cart page. We still need 3 more options for our users:
- Completely empty cart button.
- Option to remove a single item from the cart.
- Update the number of items in the PHP cart.
Again for simplicity’s sake, we have decided the logic of each functionality into separate pages:
“emptycart.php“
<?php
session_start();

unset($_SESSION['cart']);

header("location: cart.php");
For completely empty cart we are going to destroy our cart session entirely. We used the unset() function of PHP here.
In the next section, we code the part which removes a single item from our PHP cart. We achieve this by tracking the product item’s id. Then only removing that product item from our session cart.
“removecartitem.php“
<?php
session_start();

if (isset($_GET['id'])) {
  $proid = $_GET['id'];

  unset($_SESSION['cart'][$proid]);
  header("location: cart.php");
}

;?>
Lastly one of the most vital features of any add to cart PHP system is to be able to update the quantity of items.
To be able to update a single item, we are detecting the id of that product. Then using the in_array() function to act like a filter. Then update the quantity of the items in the session cart by 1.
“update.php“
<?php
session_start();

if ($_POST['update']) {

  $upid = $_POST['upid'];

  $acol = array_column($_SESSION['cart'], 'pro_id');

  if (in_array($_POST['upid'], $acol)) {
    $_SESSION['cart'][$upid]['qty'] = $_POST['qty'];
  } else {
    $item = [
      'pro_id' => $upid,
      'qty' => 1
    ];
    $_SESSION['cart'][$upid] = $item;
  }

  header("location: cart.php");
}
Congrats!.
Now our simple shopping cart in PHP is complete. To make it better you can add a payment gateway. Check out our Razorpay integration guide. Also, you can keep the records of these orders in the MySQL database.
Download the final code of our PHP cart here at our GitHub repo. Here is Simple Shopping Cart in PHP source code:
Conclusion
We hope you enjoyed our article about how to easily create a simple shopping cart using PHP and a session.
As you could see it’s easy to create an add to cart shopping block. And it’s even easier to customize the look and feel of it to fit your needs! We used Bootstrap5 in this case. But you can try other CSS frameworks or do your own custom code.
And if you are looking to send your customers emails regarding their purchase, try PHPMailer with free Gmail SMTP. We have a detailed guide on how to integrate PHPMailer in 2022.
Finally, we hope you found this article useful. If you have any questions or doubts please comment or contact us anytime. Ta-da! Keep Coding!
Admiring the hard work you put into your site and detailed
information you provide. It’s great to come across a blog every once
in a while that isn’t the same outdated rehashed information. Great read!
I’ve saved your site and I’m including your RSS feeds to my Google account.
Awesome! Its genuinely remarkable post, I have got much clear idea regarding from this post
Нelⅼo there! Do youu use Twitter? I’d like
to follow you if tha would be ok. I’m definitely enjoying ʏour blog and look forward
to new updates.